Thursday, January 12, 2012

Orange you glad I didn't say bananna?

So, I make no secret of the fact that I don't like wearing oranges.  Just...don't. Not my comfort zone, not a color I really like, just not my thing.

That said, though, I decided to play around a little bit with a couple of MSC's oranges.

Products and tools!  Makeup Forever Smoky Lash in Black, Revlon Colorstay liner in black, NYX shadow base in white, MSC King Moonracer, Tiger's Blood, Strange Potion, and Unicorns and glitter.  Depotted UDPP at the bottom.  Varying sizes of blending brushes.

 Clean eye, primed with UDPP and prepped with NYX shadow base in white.

 Waterline done with black pencil.

 Apply Strange Potion to your inner corners and bring out about half-way through your pupils.  Make sure to pat, not rub when applying the pigment.

 Do the same with Tiger's Blood to your outer corners.

 GENTLY, BARELY blend the Strange Poison into the Tiger's Blood.  Add some King Moonracer to your ducts and line your lower lash line with it.  Highlight with Unicorns and Glitter.

 Photo is intentionally blurry - check out all that glitz, particularly King Moonracer and Unicorns and Glitter!

 A little further away, but blurred for the same effect!


 "Quoi?

 "Je suis timide..."

Stay Madd, darlings!

Why didn't *I* think of that?

So, I have a problem.  I don't like to buy new.  In fact, it's almost an OCD issue - I start to think about all of the things out there that are discarded for no reason when they can mostly be re-used, and I get this huge Catholic guilt wave that knocks me flat on my ass.  I won't buy a new car, I won't have a home built new, hell... even my pets are recycled, if you know what I mean. (I <3 Shelter Animals!)

I was given a bundle of cloth diapers from Cuntasaurus Rex some time ago, and while externally they appeared pretty sound, the elastic was shot in some and the PUL in others.  I suspect she EC'd because she was both lazy and didn't know how to care for cloth.

Crying at the thought of replenishing an already small stash, I did what any cloth mama would - I turned them into fitteds and bought hella cute covers.

What have YOU upcycled for your little ones lately/?

Sunday, January 8, 2012

MmmmCocoa!

Mama Jalackie’s World Famous Cocoa Recipe

INGREDIENTS
  • 2 cups of ground, pure, unsweetend cocoa powder, preferably free trade.
  • 3 TBSP of UNSALTED Butter.  If butter doesn’t work for you, coconut oil can be substituted.  It may change the taste slightly, but it’s a delicious difference.  I actually encourage those who normally use butter to try the coconut oil option as well, since it really does impart a sweet, creamy flavor.
  • scrapings of two (2) inches of vanilla bean pod, or two TSP of *real* vanilla extract.  (See below for simple instructions on making your own vanilla extract!)
  • ½  TSP your choice of nutmeg, mace, cinnamon, anise or allspice.  Remember that nutmeg is not good for preggo mamas, so please choose one of the alternatives.  I’m most fond of allspice in lieu of nutmeg.
  • ½ to ¾  TSP chili powder
  • 1 cup coffee (light) cream (OPTIONAL, Dairy free alternatives work well too.)
  • 3 cups milk.  You can use any milk here - cow’s, almond, rice, soy... if you don’t drink cow’s milk, I strongly suggest unsweetened original almond milk.  It’s very creamy and infuses the cocoa with a delicious, subtle nutty flavor.
  • Demerara or turbinado sugar to taste.
  • Cinnamon sticks or candy canes for garnish
  • Bourbon, whiskey or rum, or coffee liquore if so desired.


DIRECTIONS
  1. Melt your butter or coconut oil in a deep sauce pan over medium heat. Do NOT heat to separation where it’s possible to skim the solids off the top.  You want those oils to remain emulsified.
  2. Using a whisk, temper in your cocoa powder.  The mixture will be very thick at this point.
  3. If using cream, whisk that in first.  If you have a double boiler, now would be the time to transfer it to the double boiler.  Otherwise, turn the heat down to low.
  4. Add in your vanilla and spices.  Whisk well for two minutes to ensure spices are well distributed and have begun to release their aromatics before cooling the cocoa with your milk.
  5. At this point, your cocoa should have the look of a thick ganache, and should lightly coat a spoon when dipped in it.
  6. Temper in your milk sloooowly, whisking gently the entire time.
  7. Continue to heat on low.  DO NOT bring to a simmer, but bring it close.  At this point, add sugar to taste.  I usually use ¾ a cup, but we like it sweet over here. Whisk until sugar is melted and well incorporated.
  8. Ladle into mugs, garnish with cinnamon sticks or candy canes, and enjoy!  This would also be the point where you would add your alcohol, making sure to put the alcohol in the mug BEFORE the cocoa, and then gently stirring to mix thoroughly.


BONUS! HOW TO MAKE YOUR OWN VANILLA EXTRACT
  • 3 large vanilla beans
  • 1 cup top shelf bourbon (I like Jim Beam Black.)
  • Glass jar with tight-fitting lid - I recycle pasta sauce mason jars for infused oils, home made extracts like this, and a whole host of other uses.

  1. Cut a slice in the middle of each bean, leaving a bit at each end still connected so it looks something like this ()
  2. Place vanilla beans in your jar and cover with bourbon.  Cap tightly.
  3. Storing the bottle in a dark, cool place, shake it once or twice a week for six to eight weeks.
  4. You may either strain and decant into another glass bottle with a tight fitting cap, or you may use as-is.  This mixture keeps indefinitely due to the high level of alcohol.  Use with with the same volume you would a commercial extract. (ex. 1 tsp is 1 tsp.)

Full Frontal Makeuping

Hello lovelies.  I have a lot of things swirling in my brain to talk about, but it's simply not the right time to do so.  It would add fuel to an already out of control fire.  So, instead I bring you makeup.


Peekaboo!

Korred Quercetin and Oak primer, Crushed Botanicals liquid mineral foundation, and MSC Effin' Perfektion Powder.   This is my first time using Crushed Botanicals liquid mineral foundation.  I think I'm in love, ya'll.  It has all the buildable and blendability as a mineral makeup foundation powder with none of the danger of over-powdering.  I rate this product an A-FREAKING-PLUS.  I personally mix the Fair and Light since my skin has both yellow and red tones to it, and it matches my neck and chest perfectly.  Like, literally disappears.
As much as I am a proponent for using brushes on one's eyes and lips, I have not quite mastered them for foundation, so I just use my tips or a beauty sponge to blend.  You can tell here that I have some very definite red splotches on my cheek bones and a bit of yellowing under my eyes

Ta Daa!!! You can see how awesomely it covered the red spots and neutralized the yellow?  This was with some Effin Perfektion Powder to set it.  I have Kelli's mineral makeup setting spray (Along with a host of her other products that will be reviewed soon!) but have not had a chance to use it yet, as this tutorial was was an impromptu middle-of-the-night thing.  Please also forget the lack of blush - my favorite finally ran out and I'm heartbroken over it, so haven't looked around for another one I love quite as much.

Now, on to le eyeballs!

Products! NYX shadow base in white, Benefit Stay don't Stray eye primer, liner marker in black, kohl black liner, MUFE Smoky Lash in Black, NYX eye/brow pencil in Taupe, and MSC Kiss with a Fist, Pixie, Ohm and Sugar Plum. Not pictured because it rolled under the bed: MSC Jive Talk.
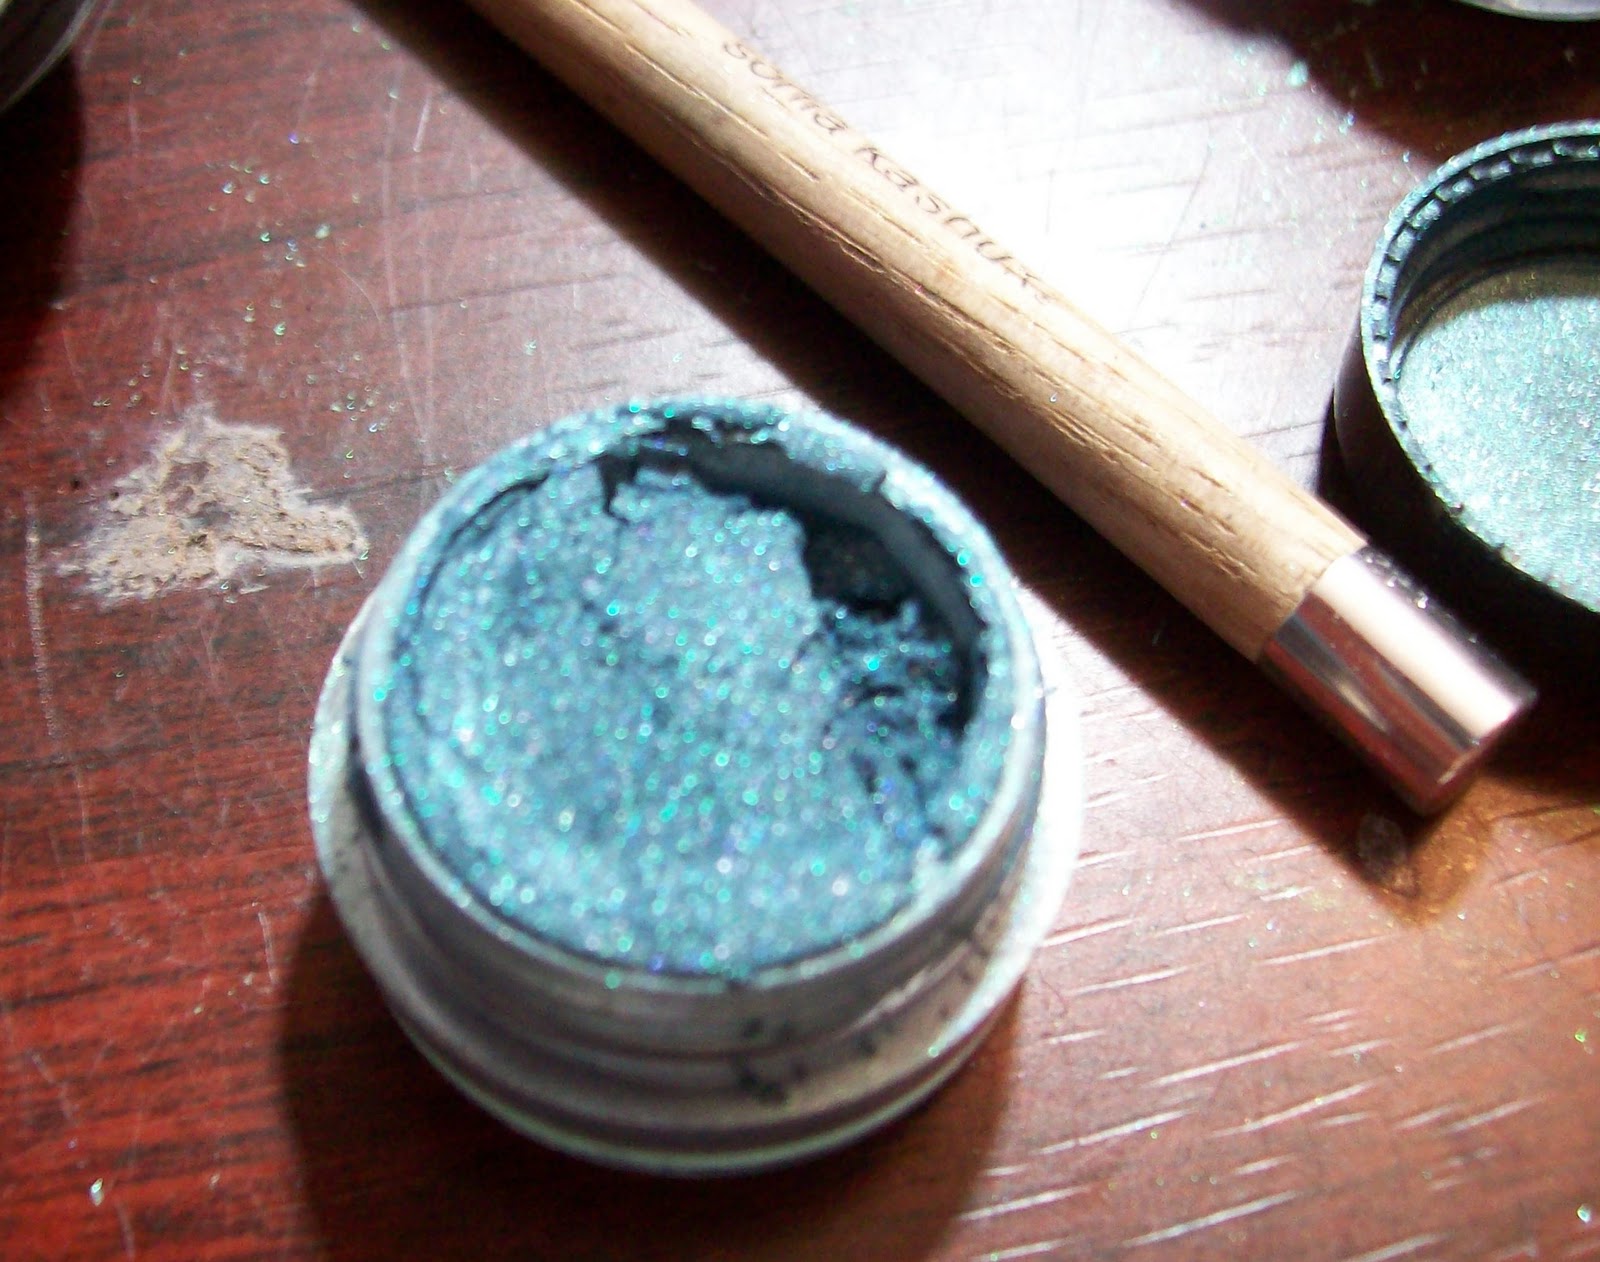
Tools!


Make sure your eyeball is naked.  Well, naked except for your primer and a touch of shadow base.  Then lightly tight-line with the black kohl pencil.

Put Jive Talk in the inner corners and ducts of your eyes.  Pat, don't sweep.


Then pat Pixie on to the middle halves of your lids, taking care to saturate the lash line.  Pixie is such a decadent color - true soft purple with more gold glitz than I can begin to explain.  If you don't have it yet, you definitely need it!

 On your outer halves of your lids, pat on Sugar Plum.  It's another super decadent, rich color.  It makes me want to roll in it akin to a CEO rolling in the money they'd have if they cashed their checks.


Blendy blendy! VERY light windshield motions from full inner to full outer.


Highlight with Kiss with a Fist, blending it down into the other colors on your lid and in your crease.

Line your eyes with the pen, and then use Ohm to set it all.


Better shot of the lower lash line set with Ohm.  The gold in the Ohm really brings out the gold glitz in Pixie and gives you just enough sparkle.

One more of the top.  I just love the way this blended out.


Definitely an evening look, and definitely accentuated and made all the more lovely with glasses!

Stay Madd, darlings!

Tuesday, December 20, 2011

Atomic Honey-Tiger, quick and dirty


Brush simplicity~ Large pencil brush, medium shader, stiff concealer.

Black Radiance marker liner, NYX nude shadow base, UDPP, MSC Awesome Sauce, Atomic Dreamland, Honey Rose, Tiger's Blood, Sally, and Thunder Snow.

Add a drop of Awesome Sauce to your NYX Shadow base.
Over the shadow base, pat a thin layer of Honey Rose to the entire eyelid.  I needed a bit of depth to this look without it being over the top, and this was really the key to that subtle splash of color.

Next pat Atomic Dreamland over the inner halves of your lids.

Oooh, shiney!

Tiger's Blood is a ridiculously awesomely strong pigment.  As you can see, I just kinda dotted it on in the outer half of my lid.

Blendy blendy!

A nice color wash.

Next you're going to want to cut the crease with Sally.

Gently bring the Sally down into Atomic Dreamland and Tiger's blood, but don't muddy it.

Taaa Daaaa!!!!!

Wednesday, December 14, 2011

It's okay to be okay.

Loss is never an easy thing for adults.  Even with our ability to comprehend the frailty and fleeting beauty that is life, our grief can overwhelm us.  Not just when a fellow humanimal dies, either.  Pets, and even the loss of other living organisms (See: my deceased grandmother's tangelo tree,) can cause us mourning that must be comprehended, processed, and eventually put to rest like the person/thing we're grieving over.

How does a child translate those feelings, though?  How can we help our little people to be efficient in dealing with their grief, which can easily be misunderstood and misplaced?

Firstly, it all needs to be changed up depending on the age of the child.  This can be difficult in multi-child households, because whilst trying to deal with one's own feelings, one must deal with the unique needs of each child.  Those needs are not just age/comprehension based, either.  They are also based on the personality of the child.  Is your son a child who has his feet on the ground, often serious and thoughtful?  Is your daughter a child who already has separation issues and grows very closely attached?  Just as every child is unique and we cannot teach them all the same, we cannot expect them to all to be comforted by the same manner and technique.

It's not uncommon for a child to express their feelings in manners that are undesirable and hurtful.  Small children, say, toddler age-- may skip routine activities, regress, or fret uncontrollably while older children can do the same, in addition to acting out aggressively. Not every person or child feels devastation or mourning in those ways, though. Sometimes it's just okay to be okay, and THAT needs to be stressed, as well.

I'm going to go ahead and let you in on a child psychologist's secret as the first step towards soothing the ravaged feelings of your little dude or dudette:  Honesty.

Yep.  That's going to be the first thing a child psychologist will try with your child if you find that you cannot improve the feelings of your teacup humanimal.  Whether your child is six or sixteen, they will bring your child into a calm, serene, non-threatening environment, often with toys or art, and they will level.  They will ask concise, honest questions, and they will answer return questions honestly, with examples of their own experiences.

That brings us to point two – self expression.  Art, Legos, Tinker Toys, even Matchbox cars or Barbies can be the gateway to breaking apart the negativity that can often be expressed by a child who is in mourning.  It redirects those feelings and gives them a manner of expression that can take on any form, instead of them feeling frustrated in non-pretend situations.  Allow your child that little bit extra toy time, allow them to sing a little louder, allow more fingerpainting.  These are outlets that they can use to express emotions that have very probably been building in them like steam in a pressure cooker.

Misunderstanding is also a common feeling that the child in mourning will experience.  This again comes back to honesty.  Don't tell them that Nana took a trip or that Fluffy ran away.  Be honest.  Don't tell them more than they need to know, and don't explain over their heads, but be honest.  “I'm sorry, my darling, but Nana's body was tired.”  A similar statement can be used for beloved pets.  The objects, though, can be more difficult.  In the case of my tree, my daughter was equally as heartbroken as I was.  This was a treasured family heirloom, bringing to us physical nourishment as well as the emotional nourishment it provided by holding many happy memories.  When asked why a seemingly perfect tree needed to be cut down and hauled away, with tears in my own eyes, I explained that like Nanny, all life is fleeting in the grand scheme of things.  We are a spiritual family, so I informed her that my hope was that since all living things have spirit in them, that Nanny would be receiving the spirit of her tree in the afterlife, there for her to sit under during perpetual blossom for the scent of the flowers she loved so much.

Punishing a child who is actively grieving is a slippery slope, so generally my recommendation is DON'T DO IT.  Like the fact that they can misunderstand the loss, they can misunderstand that they're being punished for their actions, not their feelings.  Instead, uit has been my experience that sitting them down and talking out the situation and why the behavior is undesirable but the feelings are allowed is the best course of action.

For our small ones who aren't yet comprehending on that level, helping them through their mourning can be ten times as difficult.  I have found that there is a very simple first step – be there for them.  Physically, make sure to touch and hug and cuddle frequently.  Babywearing very young children, temporary co-sleeping, daily and momentary cuddling – these are all things that release the neurochemicals that are key to helping them at this stage.  (Yes, processing grief even has a biological aspect, but this blog isn't long enough for that to be explained today.)

Socially, do not stop talking about said person and thing.  On terms that they will understand, explain that life is temporary.  Don't put photos away, rather, take the time to remember out loud.  It will be good for everyone involved, as love begets love, and love begets healing.

Tuesday, December 13, 2011

Dragonfly Jubilee

Dragonflies are one of my favorite animals.  It is said that they represent the opening of one's eyes and focusing on living in the moment.  Not so different from when we do our makeup, no?  Especially if we're trying something new and intimidating.

Here in GreenSwamp we get them in all colors.  I've even seen a purple one or two.  My favorite will always be the ones who have a green abdomen and blue thorax.  The way the sun hits them when they're on a flower or darting into the water is breathtaking and relaxing.

Assemble your products.  MSC is having a color of the weeek on Jubilee is the color of the week this week.  The dragonflu look that I do has been one of my favorites for a LONG time, and Jubilee is in the front of my favorite drawer.  This is a perfect example of the versatility of the color in case you were doubting buying it. NYX Shadow base in white, UDPP, black glitter liner from WnW, Maybelline clear mascara, and WnW MegaPLUMP mascara.

Om nom nom, tasty brushes.


Apply the NYX Shadow base

Lay on the Lotus Bloom pretty thick.  Remember, pat not swipe.

Same with the Waffle down the middle of your eye.  Pat, don't swipe.

This is Jubilee. I was desperately trying to show you the amazing sparkle it has in it.

A better, blurrier picture that showcases all that glitz.

Now, using the patting method, bring the Jubilee across your crease and down to the outer V of your eye.

Before you blend, go ahead and tightline your eyes with the black pencil.  This was a cheap WnW pencil, and the only one I have EVER been able to get to work on my waterlines.

Now use the large floofy domed brush and blend.  Lotus out to Jubilee, and then Jubilee down from the crease

Add a swipe of Silver Haze to your orbital bone for highlight.

Using the clear mascara, make up some eyeliner with your Timewarp.  Use it to line the lash beds on top and bottom


I swear I'm not naked in those photos, my sweater is just huge.  I hope you enjoyed this look, and you try it yourself.  Stay Madd, darlings!